
ra2 studio - Fotolia
Amazon Inspector gives dev automated security assessment
Cloud vulnerabilities can quickly evolve into security threats; vigilance is a key in identifying weaknesses. Amazon Inspector detects common weaknesses, providing peace of mind.

Anyone who has ever worked with PHP, Apache or MySQL Web applications is aware of how quickly vulnerabilities can surface and become widespread problems. Security and vulnerability testing are standard among many of these application types because they're frequently used. Consequently, attackers target these types of apps. Every system is vulnerable, making it nearly impossible to keep up with all of the security updates manually.
Many developers rely on third-party software for an automated security assessment. This is similar to how consumers would actively run virus scanning software to protect against known threats.
Amazon Inspector automatically detects common security issues and vulnerabilities in a Web application, as determined by the security community. AWS manages the service, making it simple to point it to an application and have the service check against known vulnerabilities that may affect it. Amazon Inspector is similar to an advanced version of AWS Trusted Advisor, but it's specific to security checks within an application.
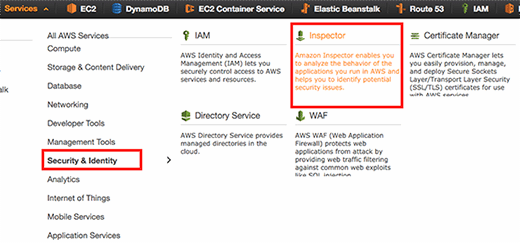
Amazon Inspector is available in the AWS Management Console under "Security & Identity."
Amazon Inspector requires an AWS Identity and Access Management (IAM) role, which requires access to the "DescribeInstances" command for Elastic Compute Cloud (EC2). Fortunately, Amazon provides a simple auto-creation process to automatically generate this basic role.
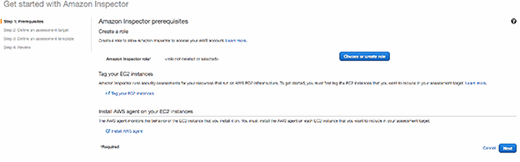
After automatically creating the IAM role, a developer needs to tell Inspector which instances need to be checked. This is done by applying specific tags to EC2 instances that need to be monitored, such as the Web application's servers. If these are running in AWS Elastic Beanstalk, be sure to apply these tags from within Elastic Beanstalk. Alternatively, if these instances are part of an Auto Scaling group outside of Elastic Beanstalk, that Auto Scaling group must be modified to automatically assign those tags. If a developer only tags the instances, the tags will not be available on new instances when they replace the old ones, and Inspector won't monitor them.
Elastic Beanstalk environments only allow developers to add tags on initial creation. They do not allow developers to modify those values without creating a new environment. However, it doesn't matter what tags are applied, as long as there are tags that can be used to identify the resources that must be monitored.
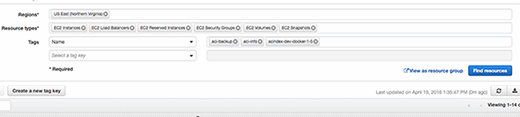
To create a Resource Group to identify Web servers, select the resources by a tag that are Web servers within the tag manager. Then click on the view as resource group. In this example, I grouped them by choosing the names of my environments.
Next, install the AWS agent on all servers that need to be monitored. This is different from many third-party security monitoring tools, as it acts as an internal or white box testing platform because the agent knows more about the configuration of each EC2 instance.
If using Auto Scaling or Elastic Beanstalk, don't just install the agent right on the EC2 instances. If using Auto Scaling, consider updating the launch configuration to include the following as a user data script:
#!/bin/bash
yum update -y
curl https://d1wk0tztpsntt1.cloudfront.net/linux/latest/install | sh
Add the following script under the uploaded source code under: .ebextensions/awsagent.config for Elastic Beanstalk instances.
commands:
install_awsagent:
command: "curl https://d1wk0tztpsntt1.cloudfront.net/linux/latest/install | sh"
Once this is set up and you verify the AWS agent is running, it's time to set up the assessment target -- a group of EC2 Instances -- for Amazon Inspector to monitor.

Next, define what tests should run.
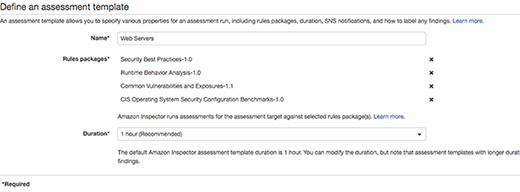
In my example, I chose all available checks. Note the "duration" here isn't how often to check, but how long each check should run. The default time period is one hour. But, for highly secure systems, developers may wish to have these checks run longer. The 15-minute interval should only be used for low-security environments where performance effect is more of an issue than security.
Once this is set, complete the creation of the template by following the prompts and the following screen will appear:
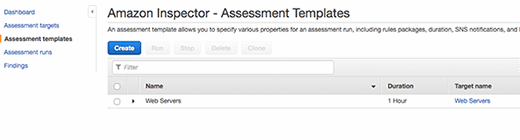
From this screen, you can run a one-time test by clicking on the checkbox and choosing Run. You can also view existing runs, create a new template or stop running tests. There is no way to schedule runs with the AWS Management Console, but this could easily be achieved using AWS Lambda with CloudWatch Events. Consider using the simple Lambda script:
var AWS = require('aws-sdk');
var inspector = new AWS.Inspector({ region: 'us-east-1' });
exports.handler = function(event, context, callback){
inspector.startAssessmentRun({
assessmentTemplateArn: 'arn:aws:inspector:us-east-1:ACCOUNTED:target/ID/template/ID'
}, callback);
}
Developers can find the assessment template Amazon Resource Name on the Assessments Templates view page by clicking the arrow next to the assessment template name.
This Lambda function can be triggered from either a CloudWatch Events rule (i.e., regular weekly, daily and so on) or as part of a continuous delivery mechanism to verify an application after initial deployment.
Analyzing Amazon Inspector findings
The "findings" section of Amazon Inspector shows the results of an automated security assessment. Findings will only appear at the end of the run. I saw some pretty basic alerts that will be handled by simply updating to the latest Amazon Machine Image:
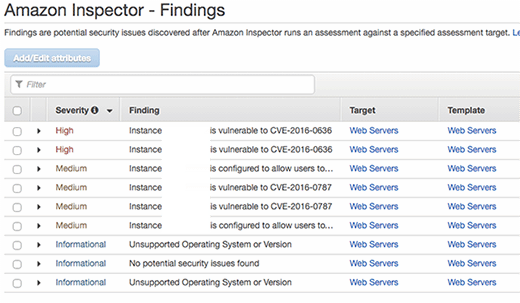
Click on the side arrow to see more details on the specific vulnerabilities detected as well as suggested ways to resolve the problems.
Wrapping it up
Amazon Inspector runs best when there is active traffic coming into the application. So be sure not to schedule runs entirely during off-peak hours. Specifying a 24-hour run period may be ideal, as it helps to gather much more data than would otherwise be discovered. Inspector isn't just an always-running process, it's an active scan to try to identify any odd behavior with an application and provide an automated security assessment of potential issues, such as client break-in attempts.
Once a run is completed, the service will give you a list of possible security and vulnerability issues. You can resolve many of these issues by updating the OS of the running instances, so enabling automatic updates will solve many of these types of problems. For others, developers will receive links to the details of the vulnerability or exploit, as well as ways to patch them. Any issues are classified by severity and require manual attention to resolve.